Difference between revisions of "EGR 224/Measurements"
| Line 1: | Line 1: | ||
This page will contain some tips and pictures for the EGR 224 Lab on Electrical Measurements. | This page will contain some tips and pictures for the EGR 224 Lab on Electrical Measurements. | ||
| − | == Tinkercad == | + | == Schematics == |
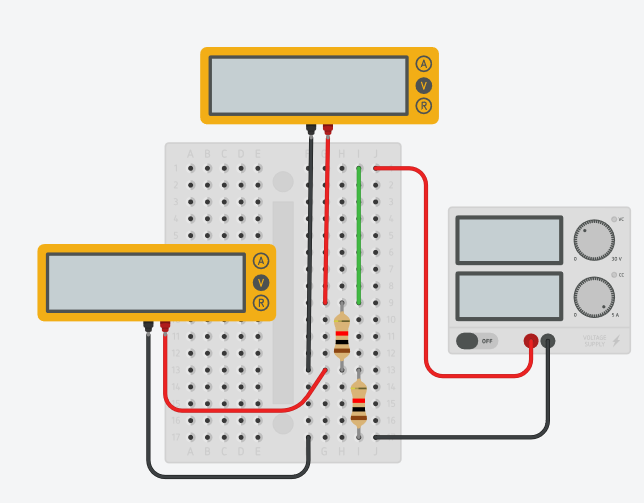
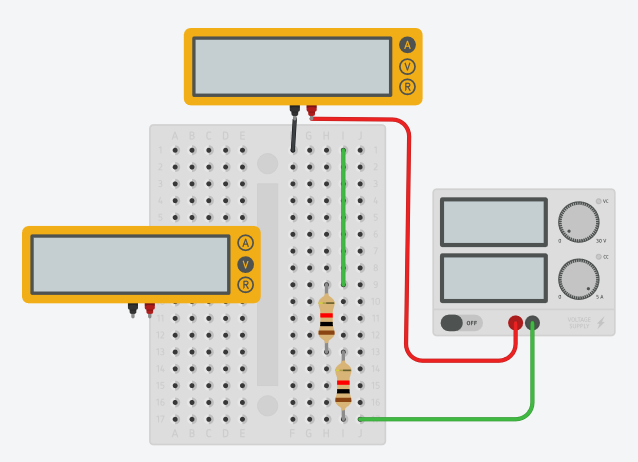
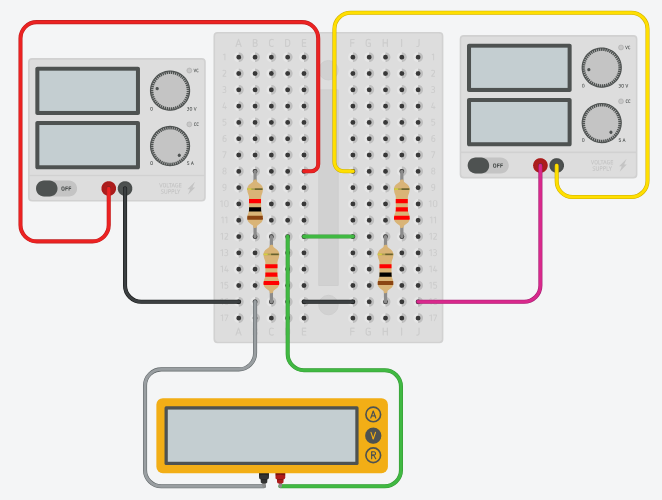
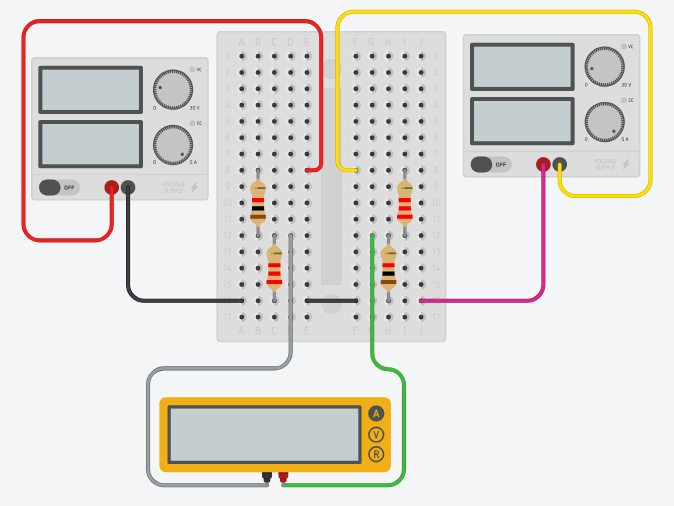
| + | These are Tinkercad representations of how you should build your physical circuits. Your wiring should generally match these. For your Tinkercad simulations, you can either build the circuit three times or you can move the multimeter wires. You will only be required to turn in a screen capture of the middle circuit, showing how you simulated measuring the resistance across the top resistor. | ||
| + | === Voltage Divider === | ||
| + | There are three different measurements you need to make. The first will be the total voltage - go by what your multimeter says and not by the digital readout on the powered breadboard. The second will be measuring the voltage drop across the top resistor (A), and the third will be measuring the voltage drop across the bottom resistor (B). | ||
| + | [[File:EGR224LAB02division.PNG]] | ||
| + | |||
| + | == Tinkercad Images == | ||
Go to [http://www.tinkercad.com www.tinkercad.com] to set up your account. Note - for the lab report, you will be uploading four screen shots to show the four different wiring configurations. You do *not* need to take three pictures of each voltage division configuration; just take a picture with one set of resistors in place. | Go to [http://www.tinkercad.com www.tinkercad.com] to set up your account. Note - for the lab report, you will be uploading four screen shots to show the four different wiring configurations. You do *not* need to take three pictures of each voltage division configuration; just take a picture with one set of resistors in place. | ||
| − | |||
=== Voltage Divider - Voltage Measurements === | === Voltage Divider - Voltage Measurements === | ||
[[File:EGR224VDIVV.PNG]] | [[File:EGR224VDIVV.PNG]] | ||
Revision as of 23:11, 21 January 2019
This page will contain some tips and pictures for the EGR 224 Lab on Electrical Measurements.
Contents
Schematics
These are Tinkercad representations of how you should build your physical circuits. Your wiring should generally match these. For your Tinkercad simulations, you can either build the circuit three times or you can move the multimeter wires. You will only be required to turn in a screen capture of the middle circuit, showing how you simulated measuring the resistance across the top resistor.
Voltage Divider
There are three different measurements you need to make. The first will be the total voltage - go by what your multimeter says and not by the digital readout on the powered breadboard. The second will be measuring the voltage drop across the top resistor (A), and the third will be measuring the voltage drop across the bottom resistor (B).

Tinkercad Images
Go to www.tinkercad.com to set up your account. Note - for the lab report, you will be uploading four screen shots to show the four different wiring configurations. You do *not* need to take three pictures of each voltage division configuration; just take a picture with one set of resistors in place.


