Difference between revisions of "Python:Turtle"
| Line 49: | Line 49: | ||
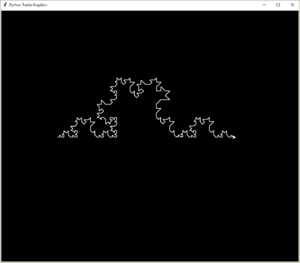
[[File:Koch reindeer.PNG|thumb|I call this the Level 5 Koch Reindeer Curve. It isn't what you will get but it is a screenshot of a slightly different fractal.]] | [[File:Koch reindeer.PNG|thumb|I call this the Level 5 Koch Reindeer Curve. It isn't what you will get but it is a screenshot of a slightly different fractal.]] | ||
For Lab 5 of Fall 2018, you will be taking a screen picture of the Python Turtle Graphics window to document your work. Save the picture in some convenient graphics format (PNG, JPG, or GIF) and when you turn in Lab 5, also attach the graphics file. | For Lab 5 of Fall 2018, you will be taking a screen picture of the Python Turtle Graphics window to document your work. Save the picture in some convenient graphics format (PNG, JPG, or GIF) and when you turn in Lab 5, also attach the graphics file. | ||
| − | * For | + | * For Windows, search for the Snipping Tool. When it opens, change the Mode to Window Snip. You will then be able to click on the Python Turtle Graphics window and it will be copied as a graphic in the snipping tool. |
| + | * For OSX, type shift-command-4; when the screen capture pointer comes up, hit space. Hover over the window you want to capture and then click. The picture will be saved on the desktop as a png file. See [https://support.apple.com/en-us/HT201361 How to take a screenshot] for more options. | ||
Revision as of 23:53, 1 October 2018
This is the (very drafty) page for information about using turtle graphics in Python for EGR 103.
Contents
References
Primary references are:
- Think Python, 2e, Allen B. Downey (especially Chapter 4)
- Python.org, Turtle graphics
Common Script
For EGR 103, any script using turtles will need to import the module, create the screen, and create the turtle. A bug at the moment makes it such that creating a turtle only works every other time. Given that, the following code will be used:
import turtle
wn = turtle.Screen()
try:
    kasa = turtle.Turtle()
except:
    kasa = turtle.Turtle()
Furthermore, another issue is that the turtle screen does not like to be moved or messed with until some kind of final screen command is issued. For that reason, if you are typing turtle commands in the console to test them out, do not or even activate the turtle screen. When you are ready to close the screen, or at the end of your script, you should issue the command:
wn.exitonclick()
Once that command runs, you can move the turtle window around or close it by clicking in the window.
Common Commands
This section will highlight the most common commands that you can apply to turtles and screens. The full list is at Overview of available Turtle and Screen Methods
Active Turtle Commands
- forward() or fd() and backward or bk()
- left() or lt() and right() or rt()
- setposition() or setpos()
- setheading() or seth()
- circle() (can also be used for polygons using steps= kwarg)
- speed()
- penup() and pendown()
- pensize()
- pencolor()
Passive Turtle Commands
- position()
- heading()
Screen Commands
- bgcolor()
- clear()
- exitonclick()
Sample Programs
Saving Pictures
For Lab 5 of Fall 2018, you will be taking a screen picture of the Python Turtle Graphics window to document your work. Save the picture in some convenient graphics format (PNG, JPG, or GIF) and when you turn in Lab 5, also attach the graphics file.
- For Windows, search for the Snipping Tool. When it opens, change the Mode to Window Snip. You will then be able to click on the Python Turtle Graphics window and it will be copied as a graphic in the snipping tool.
- For OSX, type shift-command-4; when the screen capture pointer comes up, hit space. Hover over the window you want to capture and then click. The picture will be saved on the desktop as a png file. See How to take a screenshot for more options.
